
Homelab Part 1 - Docker, Pihole & Unbound
This series is going to document my first serious look into home-labbing. I have been doing little bits here and there over the past few years. Automating this, hosting that, trying so many times and never quite succeeding to create a VPN into my home network. Over these years I have always had one thing holding me back. I have not been on my own network. I have been sharing one with lots of other people, which meant breaking things was not an option really. I’m pretty sure without breaking a lot of things, I cannot get this to work.
So here I am, finally with my own network. A strange network running off a Three unlimited data phone plan plugged into an OpenWRT Archer C7, but my network still. In the future in a prologue I will go into how I made the first section work, that was hard enough. But for now, I am going to talk about my first addition to the lab, one that it appears many people start with and the most clear to me for its benefits and ease of set up. PiHole.
The hardware I used:
- Raspberry Pi (I used the 3b as this was what I had although I have heard it works perfectly on a Pi Zero)
- An SD Card
The software I used:
- Fresh Raspbian Installation (I used lite)
- Docker
- docker-pihole-unbound repository from chriscowe (https://github.com/chriscrowe/docker-pihole-unbound)
- Macvlan networks (https://docs.docker.com/network/macvlan/)
- Git (apt-get install git)
Now I am not a complete noob with PiHole, I have been running it for the past couple of months with little to no hassle. It really is as simple as it looks, which is the brilliance of it as a first project.
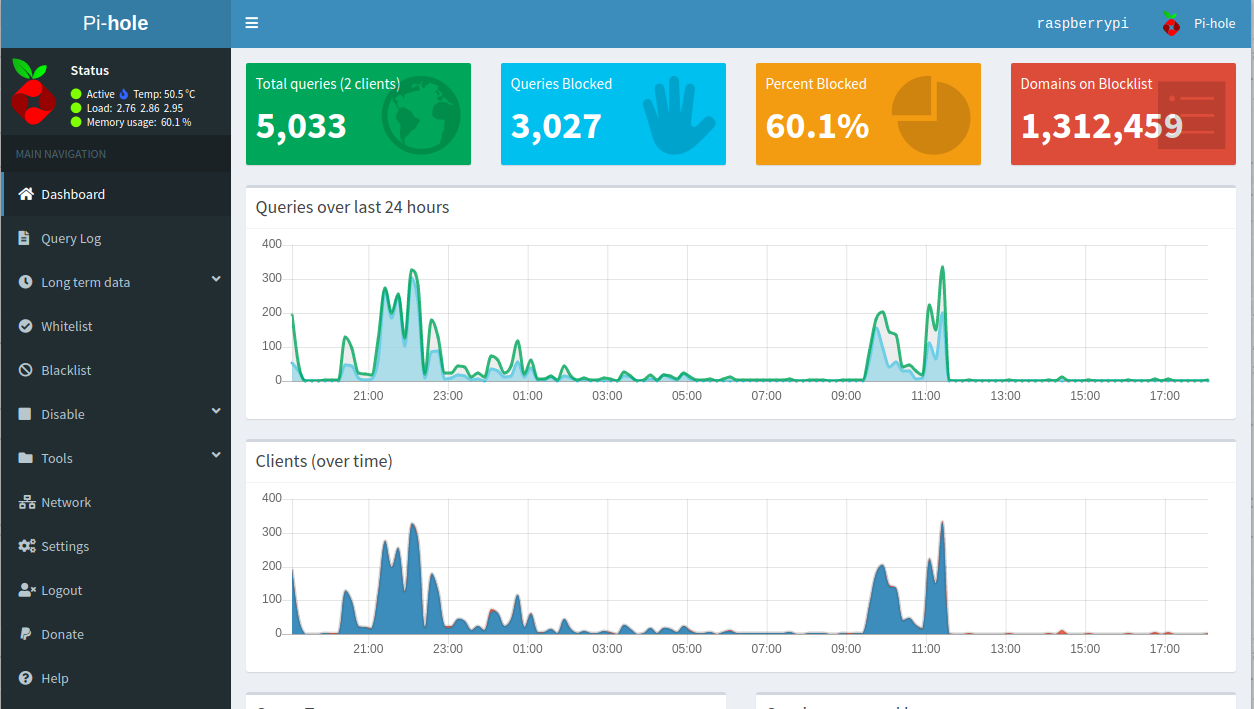
For those of you that have not heard of this before, here is a simple explanation of PiHole. A device sits between your computer and the internet and intercepts DNS traffic. It looks at these requests and compares them to lists it has been provided. If it decides this request is risky. They are trackers, ads or other malsites. They will not be forwarded to the internet and therefore will essentially be blocked.
PiHole has actually been working fantastic for me recently. I have it cranked up to a very high level of blocking as I am the only person who uses my network and I find it interesting seeing where all my traffic is going. I currently get around 60% blocking without seeing any interruptions to my internet use.
My only issue is that I have had this instance of Raspbian (The operating system) going for over a year now. I created my Ski Lodge Python Project on it and have messed around with countless other things. This leads to dependencies all over the place and makes it very hard to know what is on the Raspberry Pi and why certain updates/changes do not work.
Enter… Docker. I had a vague understanding of docker however it took this video to really make it clear to me why I would want to use it.
It keeps all the dependencies to itself in its own container and allows Raspbian to stay its raw self. Available for me to mutate and mess up later.
So now for the installation steps themselves:
-
Install a fresh instance of Raspbian onto my SD card (Steps Here)
-
Set up Raspbian securely. Including creating a new user, changing the default password, setting “sudo” to require a password every time, setting up a firewall and Fail2Ban and more (Steps Here)
- Install Docker to the pi using the following command
curl -sSL https://get.docker.com | sh - Install Docker Compose using the following command
apt-get install docker-compose - Go to the docker folder on your Pi and create a new directory with this command
mkdir /var/lib/docker/pihole-unbound && cd /var/lib/docker/pihole-unbound - Clone the docker-pihole-unbound repository with git
git clone https://github.com/chriscrowe/docker-pihole-unbound
Now comes the configuration. Once that is complete it should be as simple as running 1 command.
- Open the “docker-compose.yaml file
nano docker-compose.yaml -
Edit the line “parent: ovs_eth1” to “parent: eth0” if you are using a wired connection. If you are using a wireless connection please run the command “ifconfig” and take the name of the wireless input and replace “eth0” with it.
-
Edit the line “mvance/unbound:latest” to “mvance/unbound-rpi:latest”. This gets unbound to work correctly on the Raspberry Pi.
- Edit all of the lines that start with “- /volume1” to the correct directory for the Pi. This should be “- /var/lib”. The full lines should look something like. “- /var/lib/docker/pihole-unbound/pihole/volume:/etc/pihole:rw”
This whole setup uses (macvlan networks) which allow the pi to use the same ports multiple times which is important with something that uses as many ports as the pihole. It does this by essentially creating new devices within your pi which need their own IP address. You can read more about it in the link above.
-
Edit the “IPv4_address” line, the “ServerIP” and the “ip_range” to fit with your network (Unless you have set static IP addresses in your network and already have 192.168.1.5/6 in use. The default configuration should work without editing.)
- Open the secondary/backup DNS file
nano pihole/config/resolv.conf -
Change the line “nameserver 192.168.1.13 # secondary Pi-Hole or DNS server” to a backup pi or DNS provider. I simply changed mine to “nameserver 1.1.1.1”, this uses Cloudflare if my PiHole stops working.
- Change directory back to the compose file
cd ../.. - Execute the command
sudo docker-compose up -dWith that final command you should have an operating instance of PiHole and unbound on their own IP addresses. You can check the progress of the building of these containers using the command
sudo docker psWhen you see healthy displaying next to each container you know they are running correctly. If you do not see healthy, look back through the steps above and ensure you have not missed any stages. Also check that your IP addresses were free.
Now you can visit your PiHole at the IP address you gave it. Default is 192.168.1.5/admin. This should show you a nice fresh PiHole desktop. You can go and add new blocklists. Import a teleporter file from you last PiHole and all the usual.
We have one final thing we need to do to secure your PiHole configuration. Add a password.
- Execute the command to get into the PiHole containers shell
docker exec -it pihole bash - Execute the command and follow the instructions to set the password
pihole -a -p
That’s it, you should be complete and have an up and running secure PiHole and Unbound instance.
You can test this config with dig
dig google.com @192.168.1.5
# Expecting "status: NOERROR"
If everything is working then you need to add the IP address of your PiHole container (Default 192.168.1.5) to your DNS entry in your router or your device and watch the ads and trackers get blocked.
For blocklists I highly recommend Wally3k and The Block List Project.
For further help I recommend the PiHole Subreddit.
Most of the work here was done by Chris Cowe who created the git repository. Thanks!
Edit - Also thanks to Richard Nelson for emailing me and telling me I missed step 10! I hope nobody got to lost and confused at that point.
Thanks to any one who has read this, I hope it helped in some small way. Please get in contact if you have any questions. Good luck with future projects!